


how to draw faces better, facial proportions, proportions of the face, drawing faces for beginners, face drawing for beginners, how to draw a face step by step, profile face drawing, head proportions
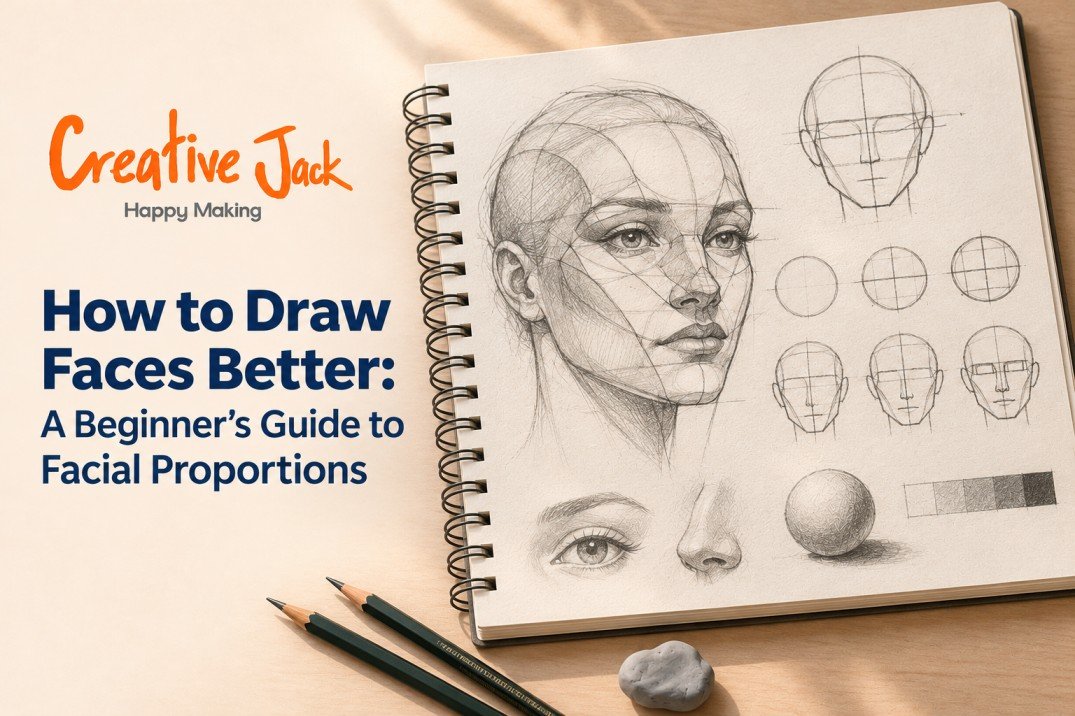
To draw faces better, learn the proportions first and the features second. In a straight-on view, the eyes sit about halfway down the head, the face divides into three roughly equal parts from hairline to chin, and the width of the face is about five eye-widths. Once those relationships are in your hands, you can place features correctly at any size, and most of what looks "wrong" in beginner portraits simply stops happening.
What You'll Find in This Guide
• The proportion rules for a front view, with the reasoning behind each
• How proportions change in profile, three-quarter view, and tilted heads
• How faces differ between children, adults, and older people
• A reliable way to measure and check your own drawing
• A short practice plan
Why Proportion Matters More Than Detail
If you have ever spent an hour on a beautiful eye and then realised it sat in the wrong place, you already know the problem. Faces are very sensitive. A feature that is a few millimetres too high or too low makes the whole face look odd, even if every feature is drawn well.
Most beginners put their effort into rendering, the shading and texture, because that is the satisfying part. But proportion is the skeleton. A well-proportioned face with simple shading looks more believable than a beautifully shaded face with the wrong layout. If you get the layout right early, everything you add later works with it.
This guide is about that skeleton. If you want to go on to features and rendering, our guides on drawing eyes, nose and lips and realistic portraits pick up from here.
Start With the Head Shape
Head proportions come before feature placement. Before the features, there is the head. A common beginner mistake is to draw only the face, as if it were a mask, and forget that it is attached to a skull.
Think of the head as a sphere with the sides sliced off, plus a jaw attached to the front. The cranium, the part that holds the brain, is rounder and bigger than most people expect. The face sits on the front and the lower part.
For a front view, draw an oval that is a little wider at the top than at the chin. A good rule of thumb is that the head is about one and a half times as tall as it is wide. Do not draw hair yet. Hair adds volume that tricks you into placing features too high.
The Front View: Rules and Reasons
These are guidelines for the proportions of the face, drawn from average faces. Real faces vary, and that variation is what gives people their likeness. But the average gives you a reliable place to start.
The Eye Line Is Halfway
Draw a horizontal line across the middle of the oval. This is where the eyes sit. Most beginners place the eyes much higher, around the upper third, because they forget about the cranium and the forehead. Measure carefully: the distance from the top of the skull to the eye line should be about the same as the distance from the eye line to the chin.
The Face Is Five Eyes Wide
Divide the eye line into five equal sections. The eyes take the second and fourth sections. The first and fifth are the space between the outer corners of the eyes and the sides of the head. The middle section, the gap between the eyes, is the width of one eye.
If your eyes look too close together or too small, this is usually why.
The Thirds of the Face
From the hairline to the chin, the face divides into three roughly equal parts: hairline to brow, brow to the base of the nose, and the base of the nose to the chin. These thirds are a quick check. If your nose looks long, measure its third. If the forehead looks short, check the first third.
Remember that the hairline moves with different hairstyles and with age, so treat the first third as a guide, not a law.
The Nose and Mouth
The bottom of the nose sits about halfway between the eye line and the chin, which also marks the end of the middle third. The width of the nostrils is about the distance between the inner corners of the eyes.
The mouth line, where the lips meet, sits roughly one third of the way from the base of the nose to the chin. The corners of the mouth line up roughly with the centres of the pupils when the person looks straight ahead.
The Ears
Ears sit between the brow line and the base of the nose, on the sides of the head. Beginners often draw them too high or too small. Compare the length of the ear to the length of the nose, which are usually similar.
A Quick Summary
• Eyes: halfway down the head
• Width: five eye-widths
• Thirds: hairline, brow, nose base, chin
• Nose base: halfway between eyes and chin
• Mouth: one third from nose base to chin
• Ears: between brow and nose base
Draw these as faint construction lines. You will erase most of them later, but they will have done their job.
Profile View
For a profile face drawing, the proportions rotate. In a side view, the proportions rotate. The head is nearly as deep as it is tall, which makes the outline closer to a circle with a jaw attached than to an oval. The ear sits roughly in the middle of the head, behind the centre line. The eye, nose, and mouth sit on the front, and their vertical positions are the same as in the front view.
Many beginners draw profiles with the back of the head too short. Remember the skull: from the front of the face to the back of the ear is often about the same as from the ear to the back of the head.
Three-Quarter View
The three-quarter view face, where the head turns about halfway between front and profile, is the most natural-looking and the most common in portraits. It is also harder.
The centre line of the face curves around the form instead of running straight down. The features on the far side of the face look narrower because they turn away from you. The far eye appears smaller and closer to the nose, and the near eye appears larger. The far ear is hidden or mostly hidden.
A useful method: draw the head as a sphere, mark a curved centre line and a curved eye line wrapping around it like lines on a globe, then place the features on those lines. The lines show you which way the form is turning.
Tilted Heads: Up and Down
When a head tilts, the guide lines stop being straight. Draw the head as a sphere and wrap the eye line and centre line around it. As the head tilts, those lines curve, and the direction of the curve tells your viewer whether the head is looking up or down. The features stay on those lines, which means that the spacing between them also changes.
Beginners often avoid tilted heads for good reason. Start by practising a single tilt, up or down, using the sphere method, before attempting more complex angles.
How Proportions Change With Age
The rules above describe an adult face. Other ages need adjustments.
Children. The cranium is larger relative to the face, and the face sits lower on the head. The eyes are lower, closer to or below the halfway line, the forehead is bigger, and the jaw and chin are smaller. Features are also smaller in relation to the whole head.
Teenagers. Proportions move gradually towards the adult pattern. The nose and jaw lengthen, and the face broadens.
Adults. The pattern in this guide.
Older people. Bones stay the same, but soft tissue changes. Skin sags, the nose and ears can appear longer, and the lines around the mouth and eyes deepen. The underlying proportions still hold, so start with the same construction and then add character.
If you ever draw a child and the result looks like a small adult, this is likely why.
How to Measure and Check Your Drawing
Proportion is a measurement problem, and you can use simple tools.
Pencil sighting. Hold your pencil at arm's length, close one eye, and measure a distance on your subject, such as the width of one eye. Compare how many times that fits across the face. Do the same on your drawing.
Plumb lines. Imagine a vertical line dropped from the inner corner of the eye. Where does it fall on the nose and mouth? Check the same alignment on your drawing.
Flip it. Look at your drawing in a mirror, or hold it up to a window with the back facing you. Errors in proportion appear immediately.
Squint. Squinting removes detail and shows you the big masses and their placement.
Grid check. If you are working from a photo, draw a light grid over it and a matching grid on your paper. Compare each square. It is a useful training method, though not one to rely on forever.
Our post on common drawing mistakes lists more checks you can use.
Common Facial Proportion Mistakes
Eyes too high. The most common error. Measure the halfway line.
Eyes too small. Compare the eye width to one-fifth of the head width.
Head too narrow. Add the cranium. Check the five-eye rule.
Mouth too low or too wide. Check the one-third rule and the pupil alignment.
Ears too high. Align them between the brow and the nose base.
Features drawn as symbols. Look at the actual shapes in front of you instead of the stored image of an "eye" or "nose".
A Short Practice Plan
Practise proportion on its own, without shading or detail. If you like a how to draw a face step by step approach, this plan follows that order, and it is a good routine for drawing faces for beginners.
• Day 1: Draw ten front-view heads using only the oval, the eye line, the five-eye divisions, and the thirds. Do not draw features.
• Day 2: Add features as simple shapes: almond eyes, a triangle for the nose, a line for the mouth. Check proportions with pencil sighting.
• Day 3: Draw five profile heads, with the ear in the middle.
• Day 4: Draw five three-quarter heads using the sphere method.
• Day 5: Draw a child's head and an adult's head side by side, and compare.
• Day 6: Draw a friend or family member from a photo, using only construction.
• Day 7: Review. Which rule did you break most often?
Repeat the cycle for a few weeks. Proportion becomes automatic more quickly than most people expect.
When to Get Feedback
Faces are one of the areas where a teacher helps most. A good teacher can see at a glance that your eyes are slightly too high or your jaw is too narrow, and can show you how to fix it. If you are thinking about portrait classes, portrait drawing courses, or portrait art classes, see our post on portrait drawing classes for what to check.
See Proportions Explained
You can watch demonstrations on the Creative Jack YouTube channel, and see student portrait work on our Instagram.
How Creative Jack Teaches Faces
Creative Jack has a Pencil Drawing course focused on realism portraits, listed under the Pencil Drawing category, and a beginner-level Professional Art Course that begins with anatomy sketching and includes charcoal portraits. Please check the course listings for levels and batch details.
FAQs
Where do the eyes go on a face? About halfway down the head, measured from the top of the skull to the chin.
How wide is a face? About five eye-widths across, with one eye-width between the eyes.
Do these proportions work for every face? They describe an average. Real faces vary, and that variation is what makes someone look like themselves.
How do I draw a face that is turned to the side? Use a sphere with a curved centre line and eye line, and place the features on those lines.
Why do my faces look like children? You may be placing the features too low or drawing a very large forehead. Check the halfway rule.
Should I draw from photos or from life? Photos are easier to start with. Drawing from life is excellent for training your eye.
How long does it take to get good at faces? Basic proportion can click within weeks. Likeness and realism take longer. See how long it takes to learn drawing and sketching.
Learning Faces in Mumbai, Navi Mumbai, Thane, and Pune
If you want in-person feedback on your faces, our Professional Art Course is listed at Art Station Andheri West, Khar West, CBD Belapur, and FC Road Pune, and at Mango Stationery in Thane West. Ask about batches for the Pencil Drawing course too.
Want Someone to Check Your Proportions?
Book a free trial class or message us on WhatsApp.
Related reads: How to Draw Eyes, Nose and Lips Realistically With Pencil | How to Draw Realistic Portraits | Portrait Drawing Classes Near Me